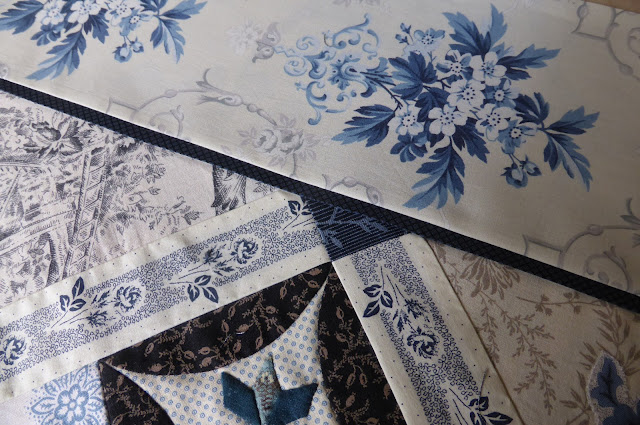
Unfortunately my closeline no longer winds up to its full height so the quilt is left dragging on the ground. It's quite a big quilt as my sashings were cut wider to accomodate the design on the fabric. The last time I blogged about this quilt I was doing the broderie perse and I don't think you've seen the centre vase and you can see how I cut the sashing fabric. I got the sashing idea from Sofie and the vase of flowers design from Lynne - it's great to have friends to get inspiration from!
I felt as though I needed a border or some kind of break between the busy triangle blocks of broderie perse and toile and for some crazy idea I decided to do a 'peek-a-boo' inner border (hmmmm, I think I can blame/credit Veronique for this one). Initially I just pinned the binding style strip sandwiched between the quilt top and the outer border and sewed it together on the machine.
Well this was a complete failure and came out all uneven. Would you believe I sewed on two sides without really looking at it and then I had to do about 4 metres of reverse sewing (unpicking) - ugh!!
So I decided to be a lot more methodical - this is the process I came up with. First carefully measure across the quilt top and mark to match up equal distances.
One problem I had was strip not staying folded and together nicely...
....so I spray starched it (as I would for bias stems).
Even though I did not cut the strip on the bias it was still acting floppy and stretchy so I stitched the two raw edges together onto the outer border with a large tacking stitch on the machine 1/8" from the edges.
Then I sandwiched it together and pinned, using the lines I had marked earlier with the frixion pen.
Also pinning carefully on the diagonal to catch the seam allowances on the triangle keystones.
Then sewing it all together, with a 1/4" seam and I used a slightly larger seam stitch.
Hopefully you can see the 1st large tacking 1/8" seam that attached the strip to the outer border and the normal 1/4" seam that sandwiched it all together.
A good press...
...and voila!!! Nice and straight and even.
I then mitred the corners the Di Ford way...
Where you hand fold, pin, tack and hand sew the border strips together. You can find Di's mitring method on YouTube.
I don't know if I would ever do another peek-a-boo border on a large quilt but I think it was worth it in the end.
Be sure to hop over to the G'nT Sisters where you can see Lynne and Sofie's AWS quilts just back from the quilter.
Thanks for your well wishes from my last post, I'm completely recovered from the flu.
Oops I nearly forgot, what's one of my posts without a CCCQ update. Here are my latest blocks only one more to go....
 |
| CCCQ Block #28 |
 |
| CCCQ Block #33 or the 'Jatz Biscuit' |
I have substituted this wreath block from
Corliss' Celebrating Mary Brown pattern there were lots of inner curves in this one!
Cheers
Carole


